
How To get a verification Badge on Instagram
We have all seen it before….Yes, that blue verification tick beside some influencers and celebrities user name. Most social media networks have this comparable verification or status symbols. Twitter, Facebook and Instagram use a similar verification scheme, a white tick on a blue background as its symbol.
Verification status was introduced by Twitter in June 2009, followed by Google plus in 2011, Facebook in 2012, and Instagram in 2014. Pininterest likewise in 2015 started signposting verified celebrity and influencer accounts.
While on YouTube, users can submit a request for a verification badge once they have 100,000 or more subscribers.
What this verification badge means
It is essential to know to remember what these symbols mean. This verification badge is not designed to represent status, position, or authority rather its created to signify authenticity. The term “verified” means that a social network has made an effort to ensure that you are who you say you are. That the account belongs to a real person. It is not a fan account, a tribute account, or at worst, a fake account.
In this article we are going to use Instagram as a case study, you will get to know how to get verified on Instagram, the importance, and some of the criteria you would need to meet before you can be verified on Instagram.
Instagram verification
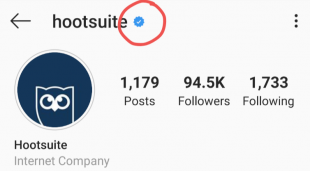
Instagram verification means establishing your Instagram account as the “authentic presence of a notable public figure, celebrity, or global brand.” An Instagram verified account gets a verified badge. It’s a blue seal with a little checkmark that appears next to your username
Importance of verification
Verification on Instagram (or other social media networks) ensures that people can find the correct account when they search for a particular personality.
However, the reason for this is that Instagram wants to ensure that people of high personality are not impersonated, by others by setting up a fake account or imitating them. Therefore there is a need to verify people who seem important enough for people to want to Impersonate.
If you are not a public figure, celebrity or influencer there is no reason for anyone to impersonate you. So, from Instagram’s point of view, there may be little or no reason to verify you.
Getting verified on Instagram
Now that you know that a verified badge on INSTAGRAM means “that Instagram has confirmed that this is the authentic account for the public figure, celebrity or brand it represents.” In other to request a verification badge on Instagram, you must be a public figure, celebrity, or brand and meet certain account requirements.
This include
- Authenticity: That is, a real person, you must be who you say you are ) registered business or brand
- Uniqueness: Your account must be a unique presence of a person or business it represents. Only one account per person or business may be verified, with exceptions for language-specific accounts.
- Must be Complete: Your account must be visible (public) and also have a well write bio and profile photo. Most importantly your profile should not contain “add me” links to other social media services.
- Notable: Your Instagram account must represent a well-known, highly searched for individual, brand or entity.
Note Instagram review accounts that are featured in multiple news sources, and they don’t consider paid or promotional content as sources for review.
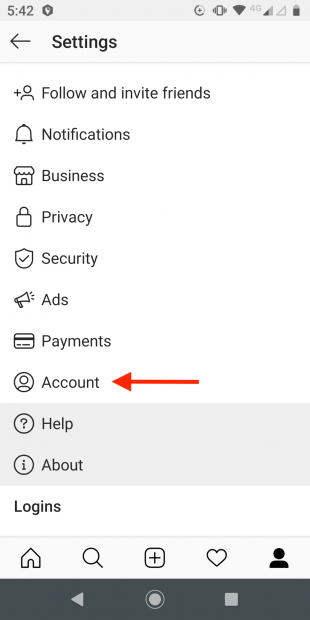
How to apply to get verified on Instagram
As difficult as it seems to be to get verified the truth is Applying to get verified on Instagram only takes a few moments. Here’s how to do it in three easy steps.
Step 1: Log on to your Instagram page
Log into your account you want to get verified If you have more than one Instagram account.
Step 2: Request for verification
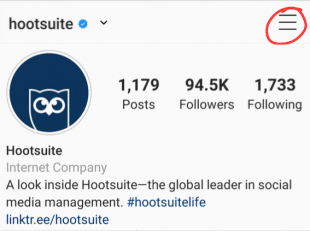
Tap the menu icon in the top right corner of your page
Click the Settings gear icon at the bottom of the screen.
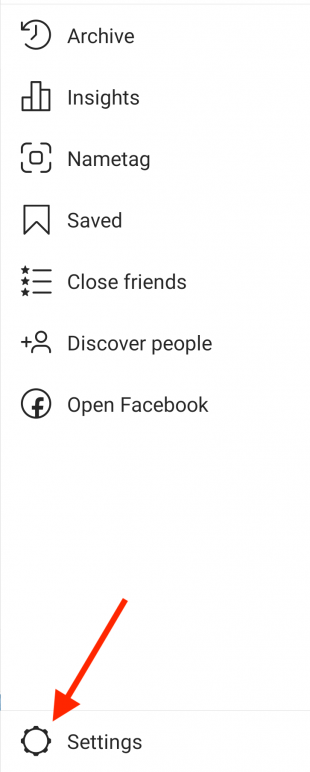
Click the Settings gear icon at the bottom of the screen.
Step 3: Confirm your identity
- Fill in your Instagram account name and complete the following fields:
- Full Name: Your full, legal name, as it appears on your government-issued identification(national ID or international passport).
- other names: This could be your name or the name of your company. Use the name that people generally know you as it could be your nickname or use your middle name instead of your first name.
- Category: You can choose from news/media, sports, government/politics, music, fashion, entertainment, blogger/influencer, business/brand/organization, or other. Pick the one that makes the most sense for your Instagram account.
- Upload a copy of your government-issued photo ID or an official business document. For an individual, you could use a driver’s license, international passport, or government-issued identity card. For a business, you could use a tax payment receipt, a bill in your company name. But Make sure the name on your document matches the name you entered above.
- Click Send.
Once you click the send button, Instagram will review your application for verification, they will be looking to “confirm the authenticity, uniqueness, completeness and notability” of your account.
Instagram will notify you whether your request is approved or denied After reviewing your application. You’ll see the message in your Instagram notifications. But don’t expect a response right away. There’s no specified timeline for how long the process takes, but it’s generally at least a couple of days.
Keep in mind that Instagram will never ask you to pay for verification, and they will not send you an email asking about your verification request. If you get a request to pay, or an email to send more details, you’re being scammed.
Remember to drop your comment(s)